ĐÀO TẠO DOANH NGHIỆP : SỞ KHOA HỌC CÔNG NGHỆ TỈNH ĐỒNG NAI

ENTERPRISE TRAINING: DONG NAI DEPARTMENT OF SCIENCE AND TECHNOLOGY.

HÌNH ẢNH TẬP HUẤN LỚP SHAREPOINT WORKFLOW VÀ KIẾN TRÚC SHAREPOINT

PHOTOS OF SHAREPOINT WORKFLOW AND ARCHITECTURE CLASS.

HÌNH ẢNH TẬP HUẤN LỚP SHAREPOINT WORKFLOW VÀ KIẾN TRÚC SHAREPOINT

PHOTOS OF SHAREPOINT WORKFLOW AND ARCHITECTURE CLASS.

Thursday, March 15, 2012

How to setup and configure Team Foundation Server 2010 (TFS 2010)


Setup Team Foundation Server 2010 (TFS 2010)

Download TFS 2010 at here and setup it
Click radio “I have read …” then click Next
Check all and click Next
Waiting Installing Components
Setup Success

Configuring Team Foundation Server 2010 (TFS 2010)

After Setup Success, Click Configure
Click Start Wizard
Or you can Open Team Foundation Administration Console

On “Application Tier” click Configure Installed Features
On “Standard Single Server” click Start Wizard
Click Next
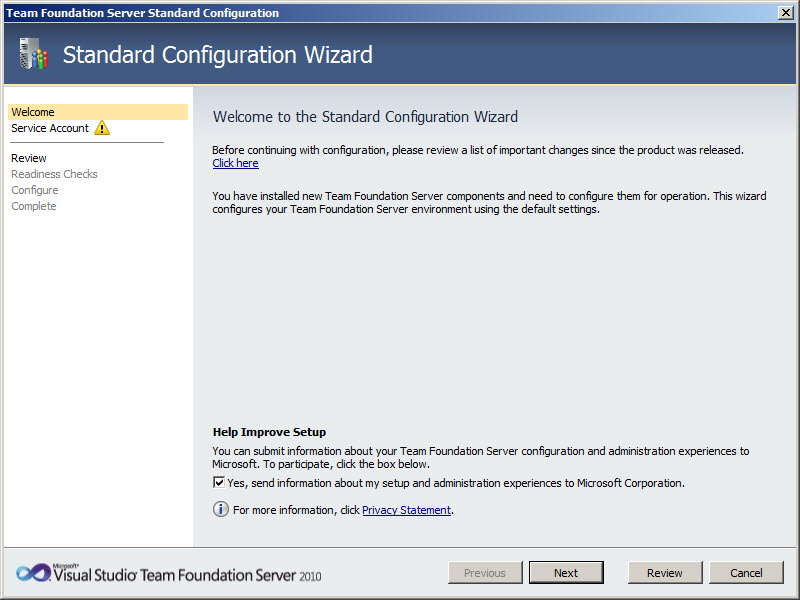
Input Account Name and Password then click Next
Click Next
If you meet error with “database  already exists …”

Solve: Go to SQL Server and delete all database as follows
Run Configuration again and met error with reporting
Solve: Go to Reporting Services Configuration Manager
On database | Click Change Database
Click “Create a new report server database” then click Next
Set default then click next
Input database name then click next
Click next
Click next
Click Finish
You see appear database already created
Click Apply
You see result as follows:
On Report Manager URL click Advanced
Input your port
Result as follows:
URLs report was created
Reboot your computer Then Configure Wizard again
Waiting Configuration Progress
Click Next
Configuration Success
Open SQL Server again and see more database
Open Visual Studio 2010 | On menu Team | Click “Connect to Team Foundation Server…”
Click to button Severs…
Enter your URL to TFS
Enter UserName and Password then click OK, you will see result as follows then click CLose
Click Connect
On server name | Right click | New team Project …
Input name
Click Next
Click Next
Click Finish
Waiting
Click Close
Result as:

Map Projects to your pc

Double click to Source Control then click to “not mapped” link
Click button “…”
Choose your folder (create new) same project name
Click Map
Click Yes
Right click your project | Add Item to folder..
Choose folder Map then click Next
Click Finish
Check in your Folder
Comment and click “Check In”  button
Waiting
Your project is checked in
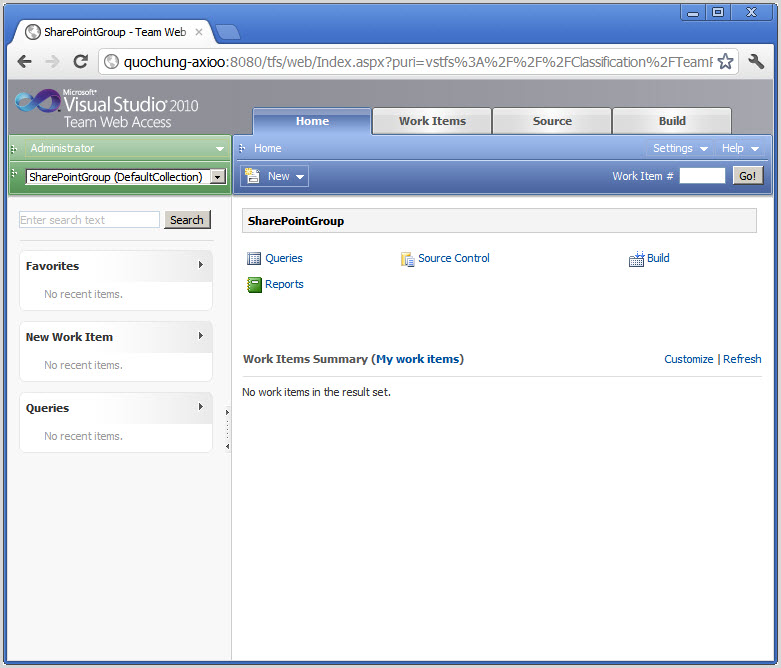
Open web brower with link below and choose your team project | click Continue
Result as
Wednesday, March 14, 2012

How to Create Fields to Sharepoint List by Windows PowerShell ISE


Below is list data type of fields

TypeName
--------
Counter
Text
Note
Choice
MultiChoice
GridChoice
Integer
Number
ModStat
Currency
DateTime
Lookup
Boolean
Threading
ThreadIndex
Guid
Computed
File
Attachments
User
URL
Calculated
Recurrence
CrossProjectLink
ContentTypeId
MultiColumn
LookupMulti
UserMulti
WorkflowStatus
AllDayEvent
WorkflowEventType
Create new list for lookup with name is Departments then add new item as follows
Create new custom list to create new field for this custom list
Copy this segment code and paste to here

$SPSite = New-Object Microsoft.SharePoint.SPSite("http://quochung-axioo:90");
#Open you web
$OpenWeb = $SpSite.OpenWeb();
#Open Your List
$List = $OpenWeb.Lists["MyCustomList"];
#Add User Field to list
$List.Fields.Add("UserField", "User", $User)
#Add TextField to list
$List.Fields.Add("TextField", "Text", $Text)
#Add UrlHyperField Field to list
$List.Fields.Add("UrlHyperField","URL",$false)
$List.Fields[“UrlHyperField”].Description = “My UrlHyperField Field”
#Add DateTime Field to list
$List.Fields.Add("DateTimeField","DateTime",$false)
$List.Fields[“DateTimeField”].Description = “My DateTime Field”
#Define Choice Field
$Choices = New-Object System.Collections.Specialized.StringCollection
$Choices.Add("First Choice")
$Choices.Add("Second Choice")
$Choices.Add("Third Choice")
#Add Choice Field to list
$List.Fields.Add("ChoiceField",       [Microsoft.SharePoint.SPFieldType]::Choice,     $FALSE,          $FALSE,    $Choices)
#Get List Item from list Lookup (Departments)
$LookupList = $OpenWeb.Lists["Departments"]
$LookupListID = $LookupList.ID
#Add Field Lookup to list
$List.Fields.AddLookup("LookupField",$LookupListID,$FALSE)
#Update view
$Views = $List.Views["All Items"]
$Views.ViewFields.Add("UserField")
$Views.ViewFields.Add("TextField")
$Views.ViewFields.Add("UrlHyperField")
$Views.ViewFields.Add("DateTimeField")
$Views.ViewFields.Add("ChoiceField")
$Views.ViewFields.Add(“LookupField”)
$Views.Update()
$OpenWeb.Dispose();
$SPSite.Dispose()
Run script Completed
Open your list and see result as follows
Try Add new item and see result as follows:

How to create Content type – Site Column – Add site column exists to content type by Windows PowerShell ISE


Create content types

Open Windows PowerShell ISE  | copy this segment code and paste to here then click Run script

$spWeb = Get-SPWeb http://quochung-axioo:90
$spWeb.AvailableContentTypes | Select Name
$parent = $spWeb.AvailableContentTypes["Document Sets"]
$contentType =  New-Object Microsoft.SharePoint.SPContentType -ArgumentList @($parent, $spWeb.ContentTypes, "Finance")
$contentType.Group = "My Content Type"
$contentType.Description = "Standard Documents"
$spWeb.ContentTypes.Add($contentType)
$spWeb.Update()
$spWeb.Dispose()

Script run Completed
Open your site | Go to Site Actions | Site Settings | In category “Gallaries” click to “Site content types” link and see result as follows:

Create Site Column

New PS1 file | copy this segment code and paste to here then click Run script
#Assumes that you are creating the site column in the top-level site of a site collection
#Script can also be used to create a site column in the Content Type Hub
#Get site and web object
$site = Get-SPSite -Identity http://quochung-axioo:90
$web = $site.RootWeb

#Assign fieldXML variable with XML string for site column
$fieldXML = '<Field Type="DateTime"
Name="TestDate"
Description="This is a test date column."
DisplayName="Test Date"
StaticName="TestDate"
Group="My Test Custom Columns"
Hidden="FALSE"
Required="FALSE"
Sealed="FALSE"
ShowInDisplayForm="TRUE"
ShowInEditForm="TRUE"
ShowInListSettings="TRUE"
ShowInNewForm="TRUE"></Field>'
#Output XML to console
write-host $fieldXML
#Create site column from XML string
$web.Fields.AddFieldAsXml($fieldXML)

#Example of changing the site column settings after creation
#Configure Test Date column to be Date Only instead of Date & Time
$dtField = $web.Fields["Test Date"]
$dtField.DisplayFormat = "DateOnly"
$dtField.Update()
#Dispose of Web and Site objects
$web.Dispose()
$site.Dispose()
Script run Completed
Open your site | Go to Site Actions | Site Settings | In category “Gallaries” click to “Site columns” link and see result as follows:

Add site column exists to content type

Open your site | Go to Site Actions | Site Settings | In category “Gallaries” click to “Site content types” then click to “Finance” content type, you have not seen any content type was added
Open your site | Go to Site Actions | Site Settings | In category “Gallaries” click to “Site columns” link and see result as follows:
Copy and paste this segment code to here

$site = Get-SPSite -Identity http://quochung-axioo:90
$web = $site.RootWeb

$ct=$web.ContentTypes["Finance"];
$fieldAdd=$web.Fields["AddSiteColumnToContentType"]
$fieldLink=New-Object Microsoft.SharePoint.SPFieldLink($fieldAdd)
$ct.FieldLinks.Add($fieldLink);
$ct.Update()

$web.Dispose()
$site.Dispose()
Run script completed
Open your site | Go to Site Actions | Site Settings | In category “Gallaries” click to “Site content types” then click to “Finance” content type, you have seen any content type was added