


1.
Download SharePoint Server 2016 Client
Components SDK at this link: https://www.microsoft.com/en-us/download/details.aspx?id=51679

2.
Install it, it should be appeared at below:

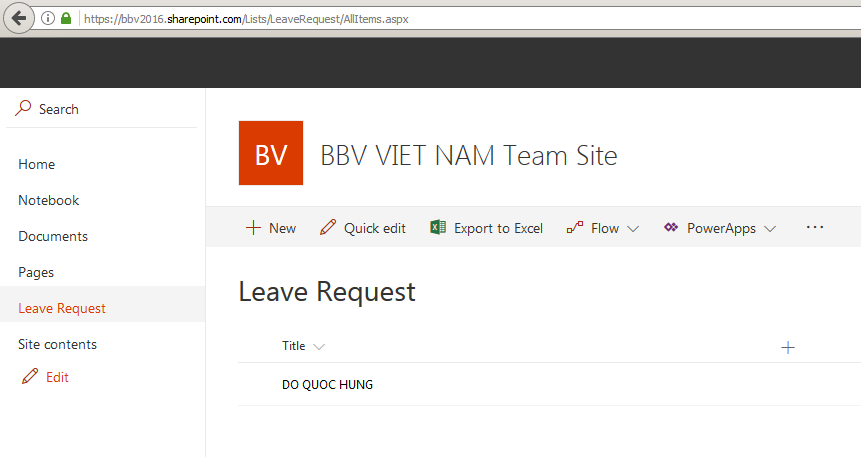
3.
Open your SharePoint site and create list “Leave
Request”
4.
Open SharePoint Online Management Shell

5.
Enter the command then input your password:
Add-Type -Path "C:\Program
Files\Common Files\microsoft shared\Web Server
Extensions\16\ISAPI\Microsoft.SharePoint.Client.dll"
Add-Type -Path "C:\Program
Files\Common Files\microsoft shared\Web Server
Extensions\16\ISAPI\Microsoft.SharePoint.Client.Runtime.dll"
$siteURL =
"https://bbv2016.sharepoint.com"
$userId =
"hungdo@bbv2016.onmicrosoft.com"
$pwd = Read-Host -Prompt "Enter
password" -AsSecureString

6.
Continue enter the command to display ID and
title of list
$credentials = New-Object
Microsoft.SharePoint.Client.SharePointOnlineCredentials($userId, $pwd)
$ctx = New-Object
Microsoft.SharePoint.Client.ClientContext($siteURL)
$ctx.credentials = $credentials
try{
$lists = $ctx.web.Lists
$list = $lists.GetByTitle("Leave Request")
$listItems = $list.GetItems([Microsoft.SharePoint.Client.CamlQuery]::CreateAllItemsQuery())
$ctx.load($listItems)
$ctx.executeQuery()
foreach($listItem in $listItems)
{
Write-Host "ID - " $listItem["ID"] "Title -
" $listItem["Title"]
}
}
catch{
write-host "$($_.Exception.Message)" -foregroundcolor red
}

7.
Finished
0 comments:
Post a Comment