


Open Microsoft Infopath Designer 2010 >> Choose
Sharepoint List >> Designer Form

Input sharepoint site address

Login with Administrator permission

Create a new sharepoint list if you have not it before

Or choose your existing list

Check to manage multiple … then click Finish

Here is infopath’s interface (Controls, Fields, …)

How to use Field
How to add new field >> Click to Add Field at right
panel then input column name, display name, … (similar to column in SQL)

After create new field, the new field appear at fields panel
>> then drag and drop it to layout

Configuring properties of Field >> Right click to Title
column >> Text Box Propeties…

You can change the properties

Create new Field: Đơn Giá (Price)

Drag and drop to layout

Create new Field: Thành Tiền

How to use Function
Drag and drop Thành Tiền to layout the right lick to Thành
Tiền >> click to fx…>>
Insert Field or Group … >> double click to Số Lượng >> ok the type * >> double click to Đơn Giá >> ok >>
ok >> ok

Click F5 >> Work Offline

Input Product (Title), Số Lượng, Đơn Giá, then Thành Tiền
will be updated automatically.

How to use Rule
Click Title >> Add Rule >> Is Blank >>
Show Validation Error
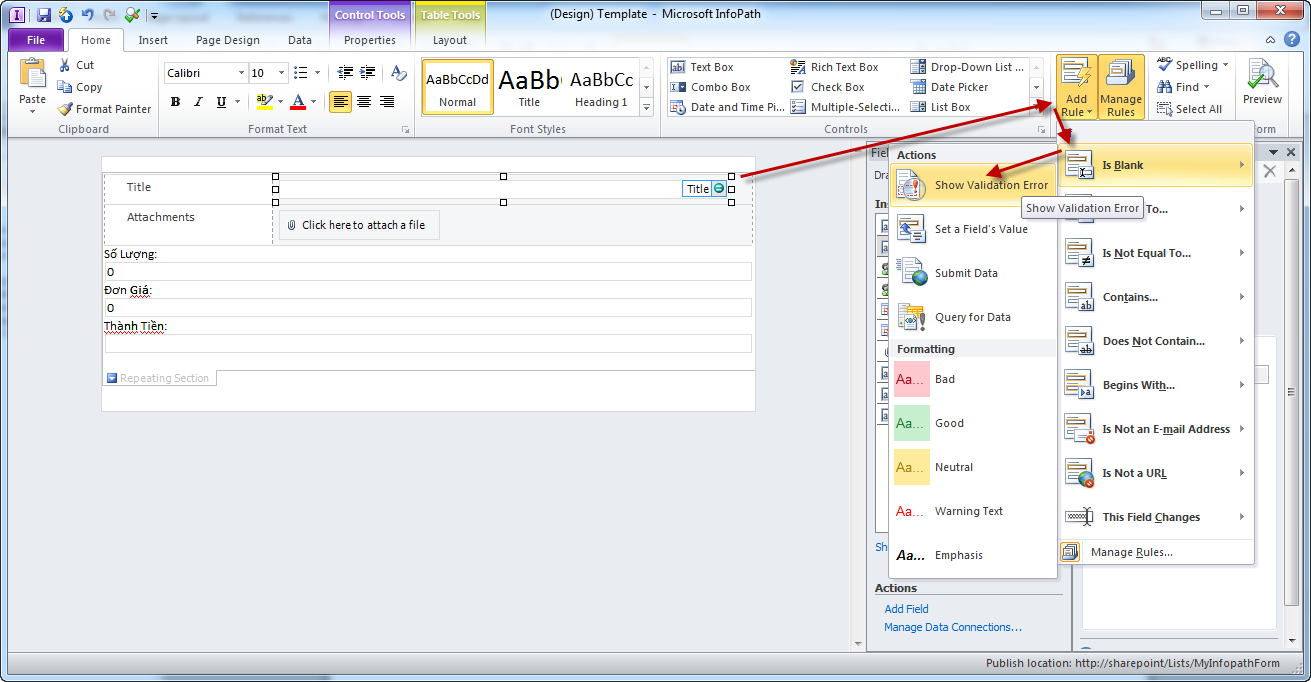
Input rule’s name:

F5 to run >> tooltip display when value is null

How to Publish Infopath Form >> File >> Quick
Publish
Published successfully

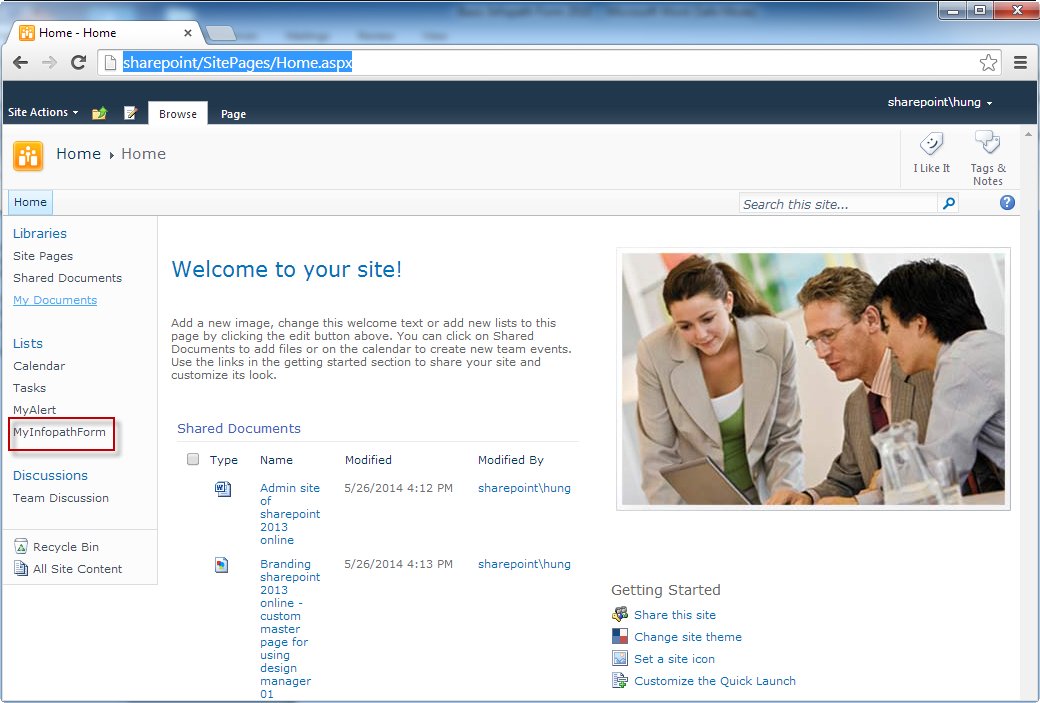
Open site collection >> you will see your InfoPath
form was published.
More Data type and Format
Add more fields, name is Description, Data type: Multiple
lines of text

Click to Dropdownlist control

Choose “Enter choices manually” then click Edit Choices

Choose value then click Modify …

Click to Field choice >> Field Properties

Update field name …

Create Lookup Field >> Create list to lookup “Company”
and input data

Click to Dropdownlist >> choose Lookup choice from
sharepoint list >> choose list company with column title

Edit Field properties and change column name is Company

Click to Fx… >> Insert Function… >> Date
>> today >> OK>> OK>> OK.

Add rule for Ngày Bán Hàng >> click Ngày Bán Hàng
>> New >>Validation

Click create new condition

Choose Use a formula

Ngày Bán Hàng is less than today() >>OK >> OK

Click And , choose Ngày Bán Hàng is greater than

Choose addDays >> OK

Here is Formula

Delete content in ()

Insert function is today() and type , 10 >> OK
>> OK

Choose Show More Options follow as


