


This is Team Site, default have not "master page" link will be display in category Look and Feel
Active some features to "master page" link will be display in category Look and Feel
Active some features to "master page" link will be display in category Look and Feel

Go to Site Actions | Site Settings
At category "Site Collection Administration" click to " Site collection features" link then find to " SharePoint Server Publishing Infrastructure" feature and active it

Go to Site Actions | Site Settings
At category " Site Actions" click to " Manage site features" link then find to " SharePoint Server Publishing" feature and active it

After active two feature you will see "master page" link will be display in category Look and Feel

Go to Site Actions | Site Settings
At category "Look and Feel" click to " Master page" then choose master page from dropdownlist

You will see user interface as follows:

Repair:
Deploy custom master page from v4.master
Open visual studio | New Project | choose Module template and provide name is mstechsharing.com

choose radio button "Deploy as a farm solution"

Change Module1 to MasterPage

Delete Sample.txt file in MasterPage module

Download default master page sharepoint (V4.master) from your web application or at here, then add new existing item to v4.master

Choose your v4.master

Open Element.xml file in MasterPage module and see Molule and File tag is configured as follows

Copy code Url="_catalogs/masterpage" RootWebOnly="TRUE" List="116" and paste to here

Delete Url MasterPage/

Copy Type="GhostableInLibrary" IgnoreIfAlreadyExists="TRUE" and paste to here


Mapping STYLES folder as follows

Choose STYLES Folder


Open mstechsharingdotcom.master and edit content below body tag

Deploy project
Go to Site Actions | Site Settings
At category "Look and Feel" click to " Master page" then choose master page from dropdownlist which it had deployed from visual

You see Hello word is appear

Design Html Page and copy resource (Image, css, js) to sharepoint folder (image 26)

In folder STYLES, create new folder mstechsharing.com

Copy image to Images | mstechsharing.com, .css to STYLES | mstechsharing.com, .JS to Layouts | mstechsharing.com (if have) from html package

Add new Style Sheet and provide name is mstechsharingdotcom.css then call mstechsharingdotcom.css to mstechsharingdotcom.master

Edit myMaster.master (mstechsharingdotcom.master) image 30
Change background
Call mstechsharingdotcom.css file above </head> tag

Open .css file in html package and copy code below

Open mstechsharingdotcom.css and paste that code to here

but you know body in normal html is different to body in sharepoint. So you use fire bug in firefox and get div contain all contain (in sharepoint 2010 that div have id= "s4-workspace")

Delete all code in mstechsharingdotcom.css and paste this code to here and change path in URL
body #s4-workspace {
background-attachment: fixed !important;
background-image: url("/_layouts/Images/mstechsharing.com/bg_body.jpg") !important;
background-position: center top !important;
background-repeat: no-repeat !important;
}

Deploy and set master page again (no require)

You see background is changed

Change width of body container. Using firebug and get that div tag with id "s4-bodyContainer"

copy this code and paste to mstechsharingdotcom.css file

Deploy project and hit F5 you will see width of body container is changed

Insert banner (image 39)
Using firebug and get where can insert banner. below div with class ="s4-title s4-lp" and above div have id="s4-topheader2"

Open mstechsharingdotcom.master and insert code html to here
<!--Insert banner-->
<div class="div-top-ban">
</div>
<!--End Insert banner-->

Paste this segment code to here
.div-top-ban {
height: 172px;
width: 980px;
background-image: url(/_layouts/Images/mstechsharing.com/top-ban.png);
background-repeat: no-repeat;
}

Deploy project
You see banner had inserted

Custom menu bar
download css at here and add existing item to STYLES | mstechsharing.com folder

at reference MenuBar.css to mstechsharingdotcom.master

Deploy project
You see menu had changed but you see have a block with width is not fix

Solve: Using firebug to get Block which it is not fix the width, it is div with id="s4-titlerow"

Paste segment code to here
#s4-titlerow
{
width:980px !important;
}

deploy project
UI is fixed as follow

Insert bottom (Image 50)
Using firebug to find where can insert bottom. insert below div with id="s4-mainarea"

Copy this segment code to mstechsharingdotcom.master (view in project)

Open mstechsharingdotcom.css and insert code css to here

deploy project
Now, you see UI have background, banner, top menu, bottom


Design page layout (image 55)
Download your Default PageLayout in sharepoint 2010 or download at here

Then add Existing Item... file DefaultLayout.aspx to MasterPage module

Rename DefaultLayout.aspx to mstechsharingLayout.aspx

Open mstechsharingLayout.aspx file and delete all and paste segment below to mstechsharingLayout.aspx file
<%@ Page language="C#" Inherits="Microsoft.SharePoint.Publishing.PublishingLayoutPage,Microsoft.SharePoint.Publishing,Version=14.0.0.0,Culture=neutral,PublicKeyToken=71e9bce111e9429c" meta:webpartpageexpansion="full" meta:progid="SharePoint.WebPartPage.Document" %>
<%@ Register Tagprefix="SharePoint" Namespace="Microsoft.SharePoint.WebControls" Assembly="Microsoft.SharePoint, Version=14.0.0.0, Culture=neutral, PublicKeyToken=71e9bce111e9429c" %> <%@ Register Tagprefix="Utilities" Namespace="Microsoft.SharePoint.Utilities" Assembly="Microsoft.SharePoint, Version=14.0.0.0, Culture=neutral, PublicKeyToken=71e9bce111e9429c" %> <%@ Register Tagprefix="WebPartPages" Namespace="Microsoft.SharePoint.WebPartPages" Assembly="Microsoft.SharePoint, Version=14.0.0.0, Culture=neutral, PublicKeyToken=71e9bce111e9429c" %> <%@ Register Tagprefix="OSRVWC" Namespace="Microsoft.Office.Server.WebControls" Assembly="Microsoft.Office.Server, Version=14.0.0.0, Culture=neutral, PublicKeyToken=71e9bce111e9429c" %> <%@ Register Tagprefix="OSRVUPWC" Namespace="Microsoft.Office.Server.WebControls" Assembly="Microsoft.Office.Server.UserProfiles, Version=14.0.0.0, Culture=neutral, PublicKeyToken=71e9bce111e9429c" %> <%@ Register Tagprefix="SPSWC" Namespace="Microsoft.SharePoint.Portal.WebControls" Assembly="Microsoft.SharePoint.Portal, Version=14.0.0.0, Culture=neutral, PublicKeyToken=71e9bce111e9429c" %> <%@ Register Tagprefix="SEARCHWC" Namespace="Microsoft.Office.Server.Search.WebControls" Assembly="Microsoft.Office.Server.Search, Version=14.0.0.0, Culture=neutral, PublicKeyToken=71e9bce111e9429c" %> <%@ Register Tagprefix="PublishingWebControls" Namespace="Microsoft.SharePoint.Publishing.WebControls" Assembly="Microsoft.SharePoint.Publishing, Version=14.0.0.0, Culture=neutral, PublicKeyToken=71e9bce111e9429c" %>
<asp:Content ContentPlaceHolderId="PlaceHolderAdditionalPageHead" runat="server">
<style type="text/css">
.page-title
{
display: none;
}
body #s4-leftpanel
{
width:0px;
height:0px;
display:none !important;
}
body .s4-ca
{
margin-left: 0px;
}
</style>
<SharePoint:CssRegistration name="<% $SPUrl:~sitecollection/Style Library/~language/Core Styles/page-layouts-21.css %>" runat="server"/>
<PublishingWebControls:EditModePanel runat="server" id="editmodestyles">
<!-- Styles for edit mode only-->
<SharePoint:CssRegistration name="<% $SPUrl:~sitecollection/Style Library/~language/Core Styles/edit-mode-21.css %>"
After="<% $SPUrl:~sitecollection/Style Library/~language/Core Styles/page-layouts-21.css %>" runat="server"/>
</PublishingWebControls:EditModePanel>
</asp:Content>
<asp:Content ContentPlaceHolderID="PlaceHolderPageTitle" runat="server">
<SharePoint:FieldValue id="PageTitle" FieldName="Title" runat="server"/>
</asp:Content>
<asp:Content ContentPlaceHolderID="PlaceHolderPageTitleInTitleArea" runat="server">
</asp:Content>
<asp:Content ContentPlaceHolderId="PlaceHolderPageImage" runat="server">
<img src="/_layouts/images/blank.gif" alt="">
</asp:Content>
<asp:Content ContentPlaceHolderId="PlaceHolderTitleBreadcrumb" runat="server"></asp:Content>
<asp:Content ContentPlaceHolderID="PlaceHolderMain" runat="server">
<table style="padding-top:0px;" border="0" cellpadding="0" cellspacing="0" ID="OuterZoneTable" width="100%">
<tr>
<td ID="OuterButton" colspan="2" >
<table style="width:100%">
<tr>
<td ID="OuterButtonLeft">
<WebPartPages:WebPartZone runat="server"
AllowPersonalization="false"
FrameType="TitleBarOnly"
ID="ButtonZoneLeft"
Title="Button_ZoneLeft" Orientation="Vertical"
QuickAdd-GroupNames="Default"
QuickAdd-ShowListsAndLibraries="false">
<ZoneTemplate></ZoneTemplate></WebPartPages:WebPartZone>
</td>
<td ID="OuterButtonMid">
<WebPartPages:WebPartZone runat="server"
AllowPersonalization="false"
FrameType="TitleBarOnly"
ID="ButtonZoneMidle"
Title="Button_ZoneMidle" Orientation="Vertical"
QuickAdd-GroupNames="Default"
QuickAdd-ShowListsAndLibraries="false">
<ZoneTemplate></ZoneTemplate></WebPartPages:WebPartZone>
</td>
<td ID="OuterButtonRight">
<WebPartPages:WebPartZone runat="server"
AllowPersonalization="false"
FrameType="TitleBarOnly"
ID="ButtonZoneRight"
Title="Button_ZoneMidle" Orientation="Vertical"
QuickAdd-GroupNames="Default"
QuickAdd-ShowListsAndLibraries="false">
<ZoneTemplate></ZoneTemplate></WebPartPages:WebPartZone>
</td>
</tr>
</table>
</td>
</tr>
</table>
</asp:Content>
Open Element.xml in MasterPage Module then delete URL MasterPage\ below

Copy Type="GhostableInLibrary" IgnoreIfAlreadyExists="TRUE" and paste to here

Deploy project
Go to Site Actions | Site Settings
In category " Look and Feel" click to " Page layouts and site templates " link then select new page default settings is (Page)mstechsharingLayou.aspx

Go to Site Actions | Manage Content and Stucture

Click to Pages

Add New Page

Typing Name: Home
Choose Page layout is "(Page)mstechsharingLayou.aspx"

Check in Page

Go to Site Action | Site Settings
In category "Look and Feel" click to "Welcome Page" link and set Wellcome page to page had created above

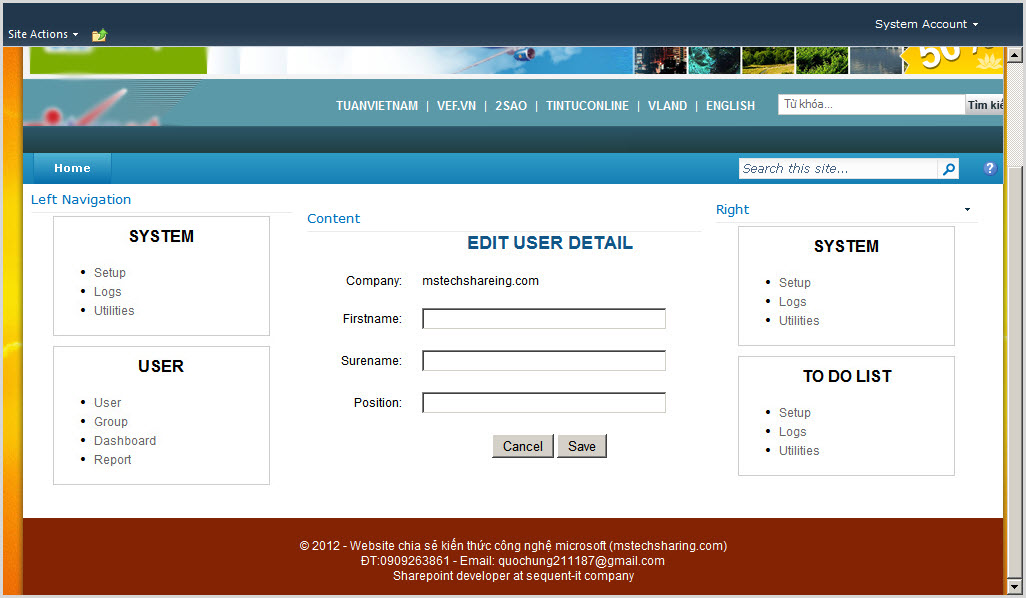
Back to home page | Edit Page and Insert image webpart (Left, center, right) as follows

Have some problems
Go to Site Actions | Site Settings
At category "Look and Feel" click to " Page layouts and site templates " you will see a problem with the width as follow:

Solve:
Using firebug to find control which effect to UI

Decrease width from 3in to 2in on firebug to view result

Copy css from firebug to your mstechsharingdotcom.css
.areatemplate-select {
height: 1.75in;
width: 2in;
}

You will see UI as follow

Read more:
Deploy Branding Solution
- Part 1: Introduction to SharePoint 2010 Branding and WCM
- Part 2: Branding a Master Page.html
- Part 3: Refining the Branding of a Master Page
- Part 4: Adding Anonymous Support to Master Page
- Part 5: Branding SharePoint 2010 Search
- Part 6: Creating a Page Layout
- Part 7: Customizing Content Query Web Parts
- Part 8: Deploy Branding Solution
- Bài viết của Hùng khá chi tiết và rất bài bản. Hy vọng sắp đến Hùng chia sẻ thêm cho anh em về kỹ thuật thiết kế trang masterpages cho cổng thông tin điện tử (trang chủ, trang tin tức , danh sách tin tức).
ReplyDeletetrungtin8x@gmail.com
hee chi tiet qua, dang lam theo, ma chua đc :)
ReplyDeleteOK. Thanks you very much. i will try share more.
ReplyDeletebài viết hay:D
ReplyDeleteExcellent Man,
ReplyDeleteThank you very much for the post.
Thanks man, you can share for all people with purpose share knownledge
ReplyDeleteThanks for providing this information on your website.
ReplyDeleteAlso see my webpage > Remove Stickers
Absolutely fabolus! This made my day since all searches so far have been bad. Great blog-post!
ReplyDeleteThanks Benny Skogberg.
ReplyDeleteHi Mansoor Pasha,
ReplyDeleteThanks for your comment!!!
This is by far the most useful post
ReplyDeleteHi Anonymous, Thanks so much.
ReplyDeleteGreat post. I followed the steps and got it to work. The only problem i ran into was the path to the images ../images/imagename. I had to modify mine to work such as ../layouts/images/imagename
ReplyDeleteI am halfway there. Having trouble with top banner.. stock there for now, but his truly awesome. Now i feel like I have some idea about creating master pages. I will pratice and in one years time, I will become very comfortable.. Thanks again
Yeah, thanks for your comment !!!
ReplyDeleteI am trying to change the custom master page under the guidance of above screens procedure i am getting error after deploying the first time of sample code u written above "HELLO WORLD!!" for me getting error as below screen
ReplyDeleteHello, where is your screen ?
Deletei got it answer mr DO QUOC HUNG . thanking u....
Deletewhat i did a mistake is export v4.master from spdesigner to local disk . code in v4.master of local disk is not excuted in visual studio. so i rectified it by copying code in v4.master from spdesiger to visual studio then it will build properly...............
any thanks for u r information ........... i gain more knowledge from u r blogspot...............
Server Error in '/' Application.
ReplyDeleteCompilation Error
Description: An error occurred during the compilation of a resource required to service this request. Please review the following specific error details and modify your source code appropriately.
Compiler Error Message: CS0030: Cannot convert type 'Microsoft.SharePoint.WebControls.ScriptLink' to 'System.Web.UI.IAttributeAccessor'
Source Error:
Line 24: var _fV4UI = true;
Line 25: script
Line 26: SharePoint:ScriptLink language="javascript" name="core.js" OnDemand="true" runat="server" __designer:Preview="<script type="text/javascript">
Line 27: // <![CDATA[
Line 28: document.write('<script type="text/javascript" src="/_layouts/1033/init.js?rev=lEi61hsCxcBAfvfQNZA%2FsQ%3D%3D"></' + 'script>');
Source File: /_catalogs/masterpage/Reddymaster.master Line: 26
Fantastic - very much appreciate all the hard work. I am still using SP 2010 and this is the MOST COMPREHENSIVE steps that I have ever seen !!!!
ReplyDeleteThank you.