Using Caml Query in Reporting services with sharepoint
Create new Report server
Download project at here
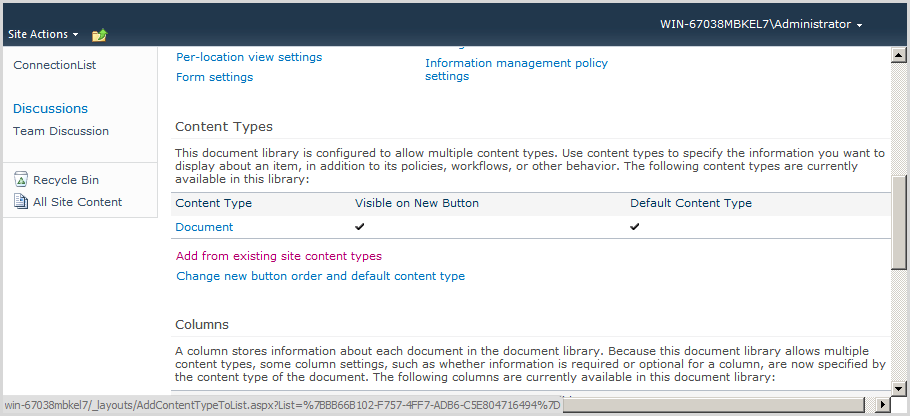
Open your Site Collection and create new Custom List name
CallCenter follow as, you can download CallCenter at here

Open SQL Server business Intelligence Developer Studio | New
Project | input name: MSTechSharing_CallCenter

Project structure follows as

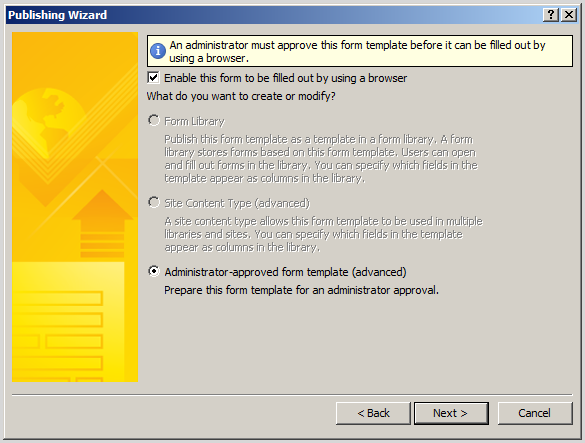
Right click Reports | Add New Report

Check to “New data source” radio button:
Name: CallCenterDataSource.
Type: Microsoft
Sharepoint List.
Connection string: your site collection
Check to “make this a shared data source”
Then click next

Click to Query Builder …

Choose CallCenter List

Click to Add Filter

Change Field name to filter then check to parameter

You can continue add filter

After filter click to “Run Query” icon

Results as under

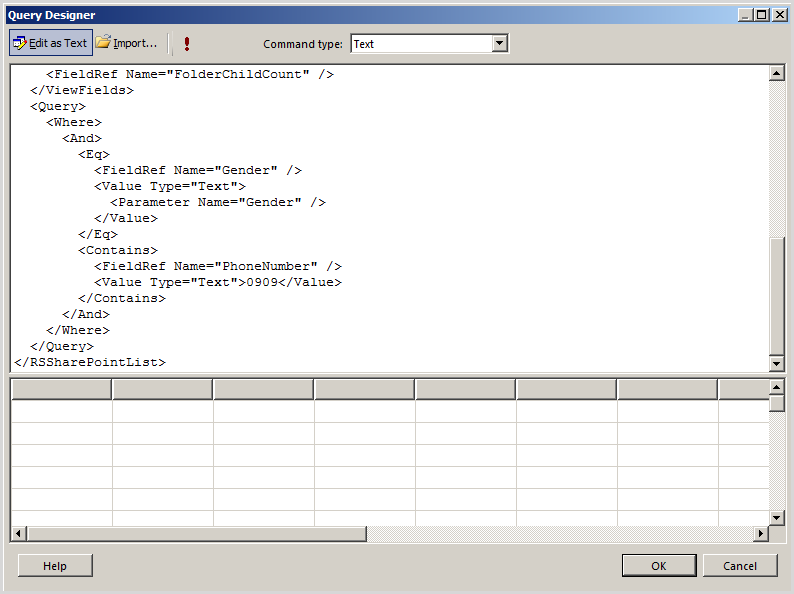
Click to Edit as Text to change the query

This is Caml Query

You can Edit or write new Caml Query from “U2U Caml Query
Builder” then click “Run” icon

Dialog Query Parameter appear (in the caml query which have
parameter. Therefore, dialog Query Parameter appear) Input Parameter Value then
click OK

Results as under

If you don’t want to save changes, click to “Edit as Text”
then click Yes button on dialog

If you want to save changes, click to OK button

Click Next

Choose “Tabular” type

Add Title to Group.
Add FullName, Age, Email, Gender… to Details>
Then click Next

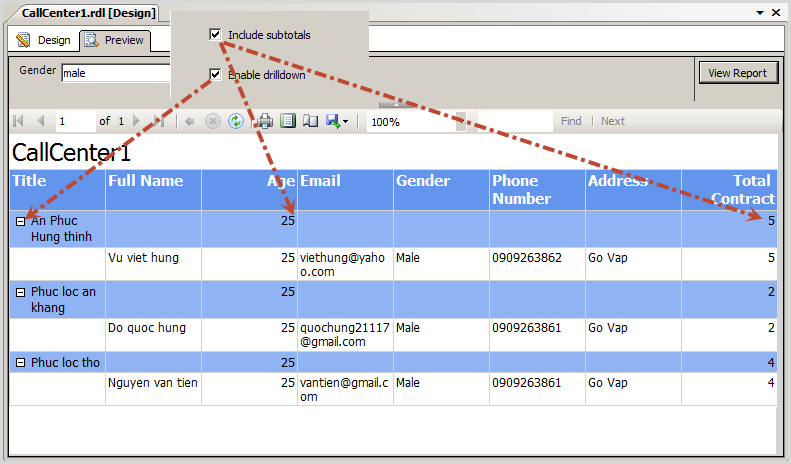
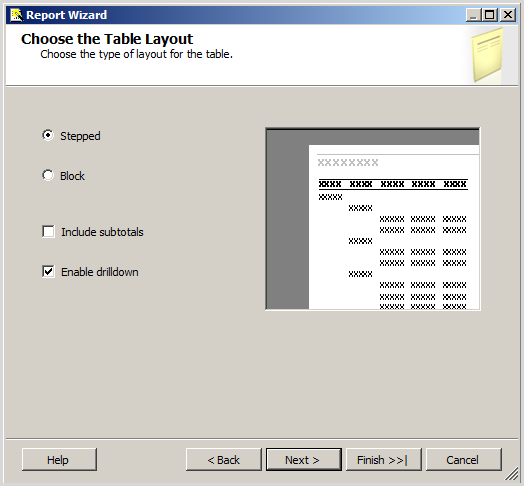
Choose Stepped radio button:
Check to Include subtotals (apply to all fields with types
is Number)
Check to Enable drilldown to expand or collapse group
Then click Next

Choose Table Style then click Next

Input Report name: CallCenter1, check to Preview report then
click Finish

Report run successful, input parameter then click “View
Report” button, result as under
Right click to CallCenter1.rdl | view code

You can see caml query, QueryParameters, and DataSourceName
to get data from sharepoint list
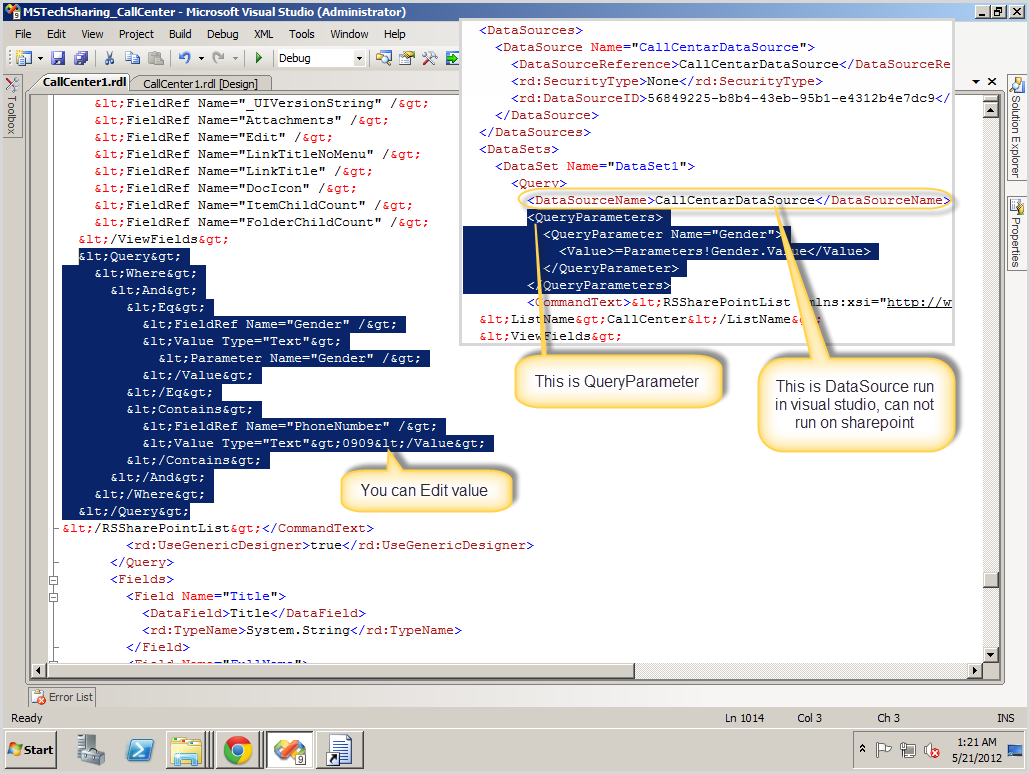
If you want to publish this report to sharepoint you must:
Delete <DataSourceReference>CallCentarDataSource</DataSourceReference>
And insert below
<DataSource …> tag
<ConnectionProperties>
<DataProvider>SHAREPOINTLIST</DataProvider>
<ConnectString>http://devsharepoint:90</ConnectString>
<IntegratedSecurity>true</IntegratedSecurity>
</ConnectionProperties>

Result as under

Open site collection and upload “CallCenter1.rdl” to
Documents(option) library

Edit any page then add webpart reporting services then input
URL to CallCenter1.rdl

Result as under (image 33)

Create Report server from Report server existing
Right click Reports | Add New Report | click to Shared data
source radio button then choose “CallCenterDataSouce”

Click to “Query Builder…” button

Click to “Import…” icon

Choose CallCenter1.rdl which was created before

Click Import

Click to OK
Click Next

Choose Tabular type then click Next

Design the table as under

Check to “Enable drilldown” then click next
Choose Table Style then click Next

Input Report name: CallCenter2 and check to Review report
then click Finish

Result as under