ĐÀO TẠO DOANH NGHIỆP : SỞ KHOA HỌC CÔNG NGHỆ TỈNH ĐỒNG NAI

ENTERPRISE TRAINING: DONG NAI DEPARTMENT OF SCIENCE AND TECHNOLOGY.

HÌNH ẢNH TẬP HUẤN LỚP SHAREPOINT WORKFLOW VÀ KIẾN TRÚC SHAREPOINT

PHOTOS OF SHAREPOINT WORKFLOW AND ARCHITECTURE CLASS.

HÌNH ẢNH TẬP HUẤN LỚP SHAREPOINT WORKFLOW VÀ KIẾN TRÚC SHAREPOINT

PHOTOS OF SHAREPOINT WORKFLOW AND ARCHITECTURE CLASS.

Friday, March 2, 2012

Part 2: How to Upgrade Commerce Server 2007 to SP1


Download package SP1 for Commerce server 2007 at here, then setup it
Click Next
Choose radio button "Yes, i accept ..." then click next
Click next
Dialog appear, click yes
Wait some minutes
After completed, choose checkbox " Launch the commerce server ..." then click Finish
Click next
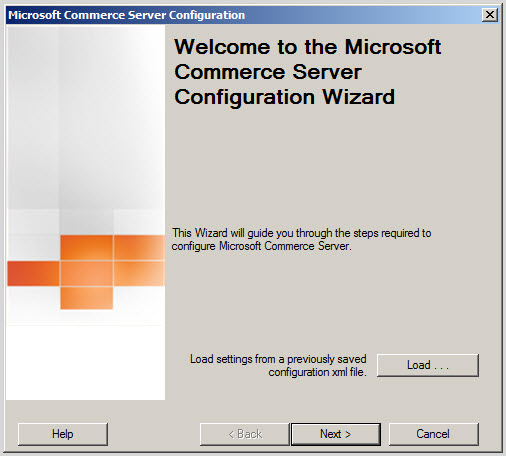
Click next
At panel Staging Reports: choose checkbox "Create an IIS ...".
At panel Staging Service Account: fill full password
Then click next
Dialog appear, click yes
At panel Direct mailer Service Account: fill full password
Then click Next
Dialog appear, click yes
Click Next
Wait Configuration Progress 
Click Finish
Part 3: Upgrade Commerce Server 2007 to SP2

Part 3: How to Upgrade Commerce Server 2007 to SP2


Download package SP2 for Commerce server 2007 at here, then setup it
Click next
Choose Checkbox "I have read and accept ..." then click next
Wait installing the software update
Click next
Click next
At panel Staging Reports: choose checkbox "Create an IIS ...".
At panel Staging Service Account: fill full password
Then click next
Dialog appear, click yes
At panel Direct mailer Service Account: fill full password
Then click Next
Dialog appear, click yes
Click Next
Wait Configuration Progress 
Click Finish
Continue click finish.
Automatically, Dialog Upgrade Wizard appear, click next
Click next
Click Finish
After Upgrade Wizard completed, dialog box appear require Restart then click Restart Now
Part 4: Setup Commerce Server 2009 Base On Commerce Server 2007

Part 4: How to Setup Commerce Server 2009 base on Commerce Server 2007


Download package commerce server 2009 at here and setup it
Click next
Click checkbox "I have read and accepted ..." then click next
Wait progress
Click next
Click next
At panel Staging Reports: choose checkbox "Create an IIS ...".
At panel Staging Service Account: fill full password
Then click next
Dialog appear, click yes
At panel Direct mailer Service Account: fill full password
Then click Next
Dialog appear, click yes
Click Next
Wait Configuration Progress 
Click Finish
Automatically, Dialog box Upgrade Wizard appear, then click Next
Click Next
Click Finish
Wait Progress
Click Finish
Restart your PC

Part 5: Sharepoint Commerce Server 2009 Configuration Wizard