ĐÀO TẠO DOANH NGHIỆP : SỞ KHOA HỌC CÔNG NGHỆ TỈNH ĐỒNG NAI

ENTERPRISE TRAINING: DONG NAI DEPARTMENT OF SCIENCE AND TECHNOLOGY.

HÌNH ẢNH TẬP HUẤN LỚP SHAREPOINT WORKFLOW VÀ KIẾN TRÚC SHAREPOINT

PHOTOS OF SHAREPOINT WORKFLOW AND ARCHITECTURE CLASS.

HÌNH ẢNH TẬP HUẤN LỚP SHAREPOINT WORKFLOW VÀ KIẾN TRÚC SHAREPOINT

PHOTOS OF SHAREPOINT WORKFLOW AND ARCHITECTURE CLASS.

Monday, July 7, 2014

Sharepoint designer 2010 – Apply master page and page layout

Go to central admin

Click to general Application settings >> configure SharePoint designer settings

Choose web application to apply then check all checkbox>> OK

Go to site collection >> Site Action  >> Edit in SharePoint Designer

A another way >> Open SharePoint Designer >> Click Open Site >> Input http://sharepoint then enter >>
require to login >> input user and pass >> OK
Waiting …

Here is default of SharePoint Designer

Click on Master Page at left panel, you will see default master page (v4.master)

Copy v4.master

Change master’s name to MyCustomV4,master

Check out MyCustomV4 then Edit File in Advanced Mode

Delete PlaceHolderLeftNarBar tag

Right click to MyCustomV4 >> Set as default MasterPage

Open Site Collection >> you see Left navigation was deleted

Go to Site Action >> Site Setting >> Site Collection Administration >> Site collection features >> Active SharePoint Server Enterprise Site Collection features

Go to Site Action >> Site Setting >> Site Actions >> Manage site features >>Active SharePoint Server Enterprise Site features

After Active you will see the Master Page link then click to that

Choose MyCustomV4.master for “Site Master Page” and “System Master Page”

You will see at “Site Master Page” was changed

And at “System Master Page” was changed >> Click to Master pages and pages layouts


Check in MyCustomV4.master

Choose Publish

And approve Master Page

Choose Approved. This …

Create Page from Master

Choose Default Master page

Named is SPDPageFromMaster
The result as
Create Page from Master, choose Specific Master Page
Change Master page to default (v4.master)
Named is SPDPageFromCustomMaster >> store in Site Pages
The result as
Change Master page to default (v4.master)
Note: if delete PlaceHolderLeftActions, some page will get error.

InfoPath for Document Library

Open InfoPath Design >> New >> SharePoint Form Library >> Design form

Here is default user interface

Design complete form follows as

Drag and drop Textbox >> set  properties for it

Drag and drop Dropdown List >> set properties for it

Drag and drop Date Picker >> set properties for it

Drag and drop Repeating Table

Set 3 columns

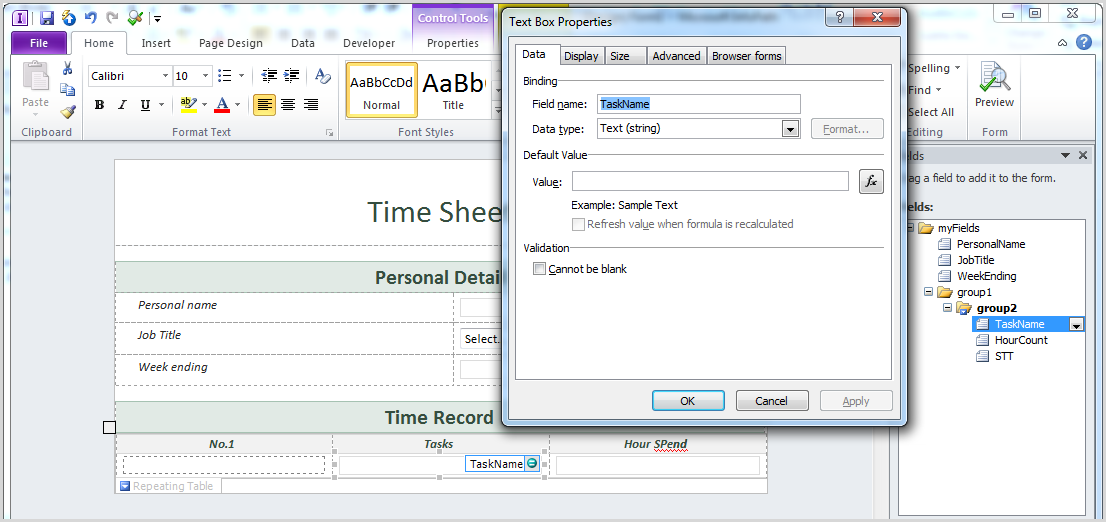
Drag and drop Textbox >> set properties for it

Drag and drop Textbox >> set properties for it (note: data type: decimal)

How to create auto number repeating table:
Drag and drop Textbox >> right click >> choose Change Control and then Calculated Value from the context menu that appears …

Reference more below
In InfoPath Designer 2010, create a new Blank Form template.
On the Home tab under the Controls group, click Repeating Table and add a repeating table with 3 columns to the form template.
Right-click the first field (field1) in the repeating table and choose Change Control and then Calculated Value from the context menu that appears.
With the first field (field1) still selected, click the Properties tab or double-click field1 to bring forward the Properties tab.
On the Properties tab under the Properties group, click Default Value.
On the Field or Group Properties dialog box on the Data tab under the Default Value section, click the formula button behind the Value text box.
On the Insert Formula dialog box, select the Edit XPath (advanced) check box.
On the Insert Formula dialog box, type the follow formula into the Formula text box:
count(../preceding-sibling::*) + 1

On the Insert Formula dialog box, click Verify Formula to ensure that the formula does not contain any errors. Click OK to close the message box that says whether the formula contains or does not contain errors. Correct any errors if necessary.
On the Insert Formula dialog box, click OK.
On the Field or Group Properties dialog box, ensure that the Refresh value when formula is recalculated check box is selected, and then click OK.
Finish !!!
Save the InfoPath form template and publish it for example to a SharePoint form library.

Click ok

Save file

Input your site collection

Login to SharePoint site

Choose Form Library
Choose create a new form library

Input library name

Add 3 columns follow as

Add more column to display sum of time >> Add >> HourCount, in Function choose sum

Click Next

Publish

Preview

Input data

Open SharePoint site

Input data in SharePoint form library, you can see No.1 auto increase

Save form

Form is saved with sum HourCount.


Thanks.