In this article, you
will know how to create SSRS connect to Sharepoint List.
Step 1: Click Start |
SQL Server Business Intelligence Development Studio
Step 2: Choose Report
Server Template and named is SSRSConnectSharepointList
Step 3: Right click
Report | Click Add New Report
Step 4: Add new data
source, in combobox Type choose “Microsoft Sharepoint List”
Step 5: Connection string:
enter your web application then click Next
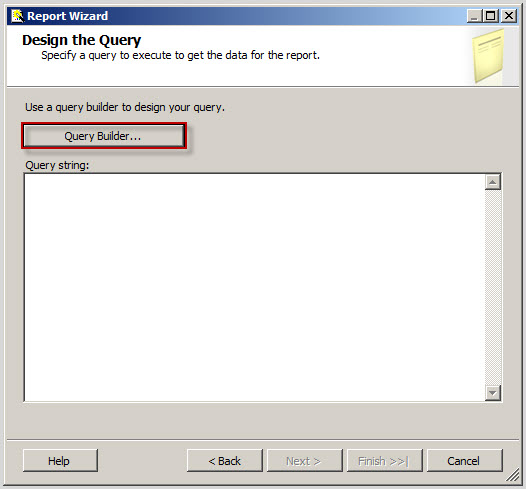
Step 6: Click button
Query builder…
Step 7: Choose Table
name then click OK
Step 9: Set default then
click Next
Step 10: Choose column
and click Details> button then click Next
Step 11: Set default
then click Next
Step 12: Enter Report
name is: HistoryCall | Check to Preview report and click Finish
Step 14: Right click to
HistoryCall.rdl | View code
Step 15: Find to code
here
Step 16: This is code
general when configure Reporting (Default), you must add similar below
<DataSource Name="DataSource1">
<ConnectionProperties>
<DataProvider>SHAREPOINTLIST</DataProvider>
<ConnectString>http://quochung-acer</ConnectString>
<IntegratedSecurity>true</IntegratedSecurity>
</ConnectionProperties>
<rd:SecurityType>Integrated</rd:SecurityType>
<rd:DataSourceID>007a7ef9-ff7e-4106-a0ca-80e26af81c28</rd:DataSourceID>
</DataSource>
Step 17: Open your site
| choose list library Shared Documents and Uploaded File | choose file to
HistoryCall.rdl
Step 18: Result,
HistoryCall added to here
Step 19: Back to Home
page
Step 20: Click Site
Actions | Edit Page
Step 21: Cick tab Insert
| Web Part
Step 22: In categories |
choose SQL Server Reporting | SQL Server Reporting Services …
Step 23: Click “Click
here to open the tool panel” link
Step 29: Click Save and
Close Icon, Result below
Step 30: Go to home | click
to List Shares Documents | click to HistoryCall.rdl directly


0 comments:
Post a Comment